Tips and Tricks for Hackers
There are a few handy tricks that you can use to fully experience the apps you’re building. This document contains a few tricks that may be useful.
See Your Gigabit App Through A Browser
If you have a box in Utah and another in DC, as we did in example 2, with a gigabit link in between, it may be nice to see your app through a browser.
For example, perhaps one box was intended to act as a client, and another as a web server, because you’re building a next-generation webapp that relies on a high speed connection. Using you application from home doesn’t take advantage of the high speed link the client box has, so you need to see your app through the eyes of the client, as if you were sitting in Utah.
X, commonly called X11 is a tool that can use to gain a remote desktop capability with your provisioned client. This is possible if:
- The system you are remoting from (your Mac, Thinkpad, windows box, etc) supports X11
- The system you are remoting to supports X11, and has SSH installed
In terms of requirement number 1, this is easiest is your laptop or desktop has a recent version of OSX or Ubuntu installed. It’s possible with a Windows computer too, with a little extra work.
Requirement #2 is easily satisfiable if the system you are remoting to has Ubuntu installed. From there, getting X11 and a Firefox browser installation is as simple as:
$ sudo apt-get update
$ sudo apt-get install xorg openbox ubuntu-desktop firefox
And then from your terminal:
$ ssh -X username@pcXXX.genihost.net
At that point, any windowed application you run in the terminal on the remote host will open a window on your local machine. Try something like:
$ firefox
And you should see a window appear, showing your Firefox browser running remotely.
Accessing Nodes Behind Firewalls
In a couple of the example projects, we set up nodes in Utah and Washington DC. In DC, the names of our nodes were prefixed with pg. For example, the name of the node might be something like pg502.
Nodes prefixed with pg are behind a firewall, and accessing them can only be done through another node networked with them. For that reason, it’s easiest to set up an SSH tunnel to reach the pg node.
This is a necessary part of completing Example 2, so it would be good to know how this works ahead of time.
Setting Up an SSH Tunnel
Let’s say that we have two GENI nodes set up: pc100, and pg200.
Locally, you would open up two SSH terminals. One will be for connecting to pc100 at pc100.emulab:22.net, and the other will be for connecting to pg200 at pg200.emulab.net:22.
We can easily connect to pc100 directly in one terminal. But in the process, we’re going to have a tunnel open on that same connection. For example, we’ll execute something in the form of:
$ ssh -p [pcxxx port] [username]@[pcxxx host] -L 2222:[pgxxx host]:[pgxxx ssh port]
How generic! Let’s put that into perspective for our example, with the username ‘katzgrau’. We’ll execute:
$ ssh -p 22 katzgrau@pc100.emulab.net -L 2222:pg200.emulab.net:22
At that point, you should have connected by SSH to pc100. Now, we’re in the clear to connect to pg200. The generic for would look like:
$ ssh -p [local tunnel port][username]@127.0.0.1
But in this example, we’ll execute:
$ ssh -p 2222 katzgrau@127.0.0.1
Our SSH connection will be routed through pc100 over to pg200, and we should be good to go!
If you find yourself having trouble with this, it may be wise to read up on SSH tunnels in general. They can be confusing to a newcomer, but that barrier is easily overcome. In addition, creating tunnels can be very handy in your experiments.
Saving Configurations/RSpecs
If you’ve gone through the trouble of setting up a complex topology with specially configured nodes, it can be extremely helpful to save configuration of your experiment into an RSpec/text file. Next time that you want to set up the same experiment, you can load in the RSpec.
To see the RSpec that was generated while you were configuring your project, click the “View” dropdown on the upper left of the slice pane:
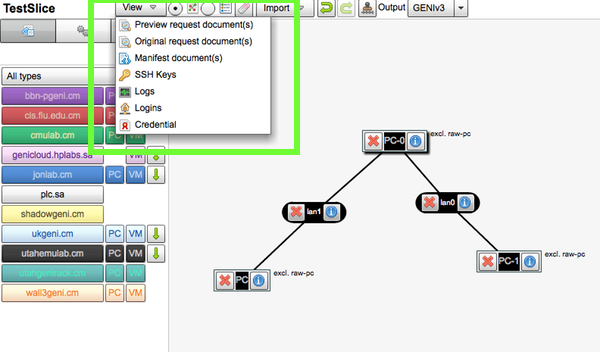
From there, click “Preview request documents”, and you should see:
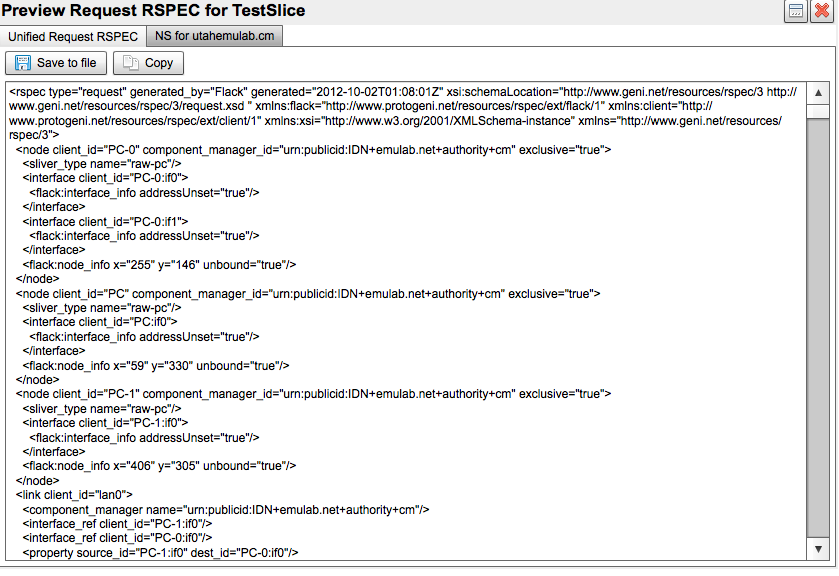
You have the copy to copy this RSpec or save it to a file. It’s probably best to save it to a file so you can load it up later. When that time comes, click the “Import” dropdown.
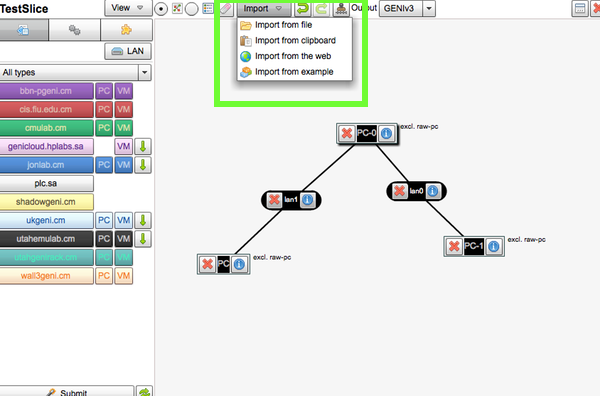
When you import the RSpec, your experiment will be created with all the same settings and configurations it had before.